Car Carpet Installation Tools Needed: The Complete 2026 DIY Checklist
Last Saturday, an enthusiast in Melbourne spent four hours stripping his classic's interior, only to realize he didn't have the right heavy duty shears to trim the thick pile carpet he'd just purchased. You've likely felt that same hesitation, worrying that one jagged cut or the wrong adhesive could turn a A$500 project into a costly mistake. It's a common fear to get halfway through a restoration and realize a crucial piece of equipment is missing, or worse, to accidentally snap a delicate plastic trim piece because you're using the wrong pry bar.
At Tru-Fit, we've spent more than 40 years manufacturing and fitting automotive flooring, so we know exactly what it takes to get the job done right the first time. We've compiled this comprehensive guide on the car carpet installation tools needed to help you achieve a professional, factory-finish look without the stress of loose sections or unsightly wrinkles. This checklist covers every essential item, from specialized cutting blades to the high-temperature adhesives required for the harsh Australian climate, ensuring your cabin remains quiet and perfectly insulated for years to come.
Key Takeaways
- Learn why standard household tools fall short and which specific professional hand tools are required to ensure a long-lasting, high-quality finish.
- Discover the essential interior removal equipment designed to protect your vehicle’s delicate plastic trim and dashboard from damage during the preparation phase.
- Master the precise "X" technique for bolt holes and identify the exact car carpet installation tools needed to achieve a seamless, factory-perfect fit.
- Gain expert insights into the specialized equipment required for applying sound deadening and adhesives to ensure maximum thermal insulation and cabin control.
- Find out how choosing Australian-made moulded carpets simplifies your project by eliminating the need for complex professional stretching and tensioning tools.
Essential Hand Tools for Automotive Carpet Installation
Installing a new interior requires more than just patience; it demands a specific set of car carpet installation tools needed to achieve a factory-standard finish. At Tru-Fit, we've spent more than 40 years manufacturing moulded flooring, and we've seen how standard household scissors fail against heavy-duty 550gsm automotive pile. You can't rely on kitchen tools for a professional fit. Most DIY disasters, like the dreaded "short cut," happen because the installer used a tool that wasn't sharp or precise enough for the job. A single slip with an inferior blade can leave a gap between the carpet and the kick panel that is impossible to hide.
Safety is your first priority before you even unroll the new product. Old Australian cars often contain deteriorating bitumen sound deadening and brittle adhesives that crumble into fine, irritating dust. You must wear a P2-rated mask and heavy-duty work gloves. These protect you from inhaling old particles and prevent cuts from the sharp metal edges found around seat anchors and door sills. Professional results depend on the "Golden Rule" of the trade: measure twice and cut once. This Automotive Upholstery Overview provides a look into the foundational craft and materials that make high-quality interior work possible.
The Basic Tool Checklist
- Heavy-duty utility knife: Buy a pack of break-off blades. You should snap off a fresh, razor-sharp tip every 3 or 4 major cuts to ensure the blade slices through the backing without pulling the fibers.
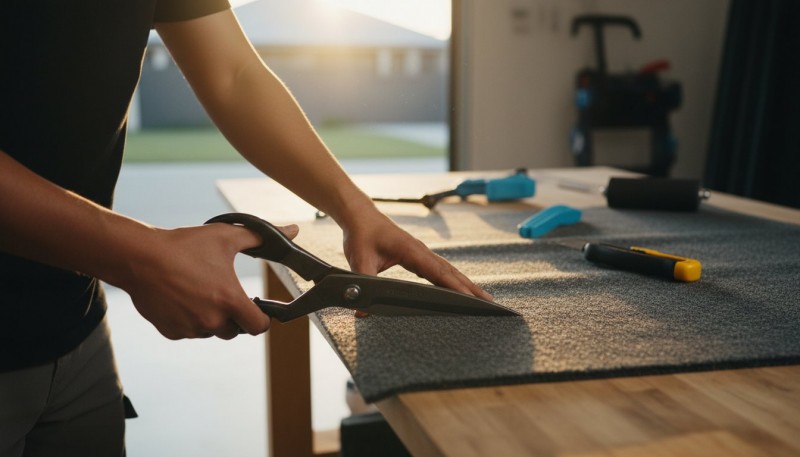
- Professional fabric shears: Standard scissors will bind and chew through thick automotive pile or moulded vinyl. High-quality shears provide the leverage needed for clean, long runs.
- Flexible tailor's tape: A standard steel tape measure is fine for flat sections, but it won't accurately follow the deep curves of a transmission tunnel or a 4WD floor pan. A flexible tape ensures your measurements account for every contour.
Marking and Layout Tools
Dark carpets make standard pens and pencils useless. You need white tailor's chalk or silver marking pens to create visible lines on the carpet backing. These allow you to map out your cuts before the blade ever touches the material. Use masking tape to create templates for complex corners or to protect visible plastic trim pieces from accidental scratches during the fitment process.
The most important layout tool is a sharp awl. Instead of cutting large holes for seat bolts and seatbelt anchors, use the awl to poke through the carpet from underneath the vehicle. This tool separates the carpet weave rather than tearing it. It allows you to locate bolt holes with 100% accuracy while maintaining the structural integrity of the carpet pile. Having these car carpet installation tools needed on hand prevents 90% of the common errors that plague first-time installers.
Specialized Tools for Interior Removal and Surface Preparation
Trim and Seat Removal Kit
- Nylon trim removal set: Essential to pop clips and pry plastic covers without scratching paint or damaging the dashboard.
- Complete socket set: You'll need both metric and imperial sizes. While modern 4x4s are metric, many classic Australian Holdens and Fords require imperial tools for seat anchors.
- Torx and Allen key sets: These are mandatory for modern vehicles and European models where standard hex bolts aren't used for seatbelt anchors or consoles.
Surface Cleaning and Prep
Removing 40 years of Australian dust and grime requires more than a quick wipe. Having the right car carpet installation tools needed for surface prep ensures the new insulation and carpet bond perfectly to the metal. A "clean floor" means removing every speck of red dust and old adhesive residue.
- Wire brush or drill attachment: Use these to strip back stubborn rust spots or old glue from the floor pan ribs.
- Vacuum with a crevice tool: Necessary to reach deep into the channels of the floor pan where debris collects.
- Wax and grease remover: A final wipe with this solvent ensures a chemically clean surface for the new adhesive.
If you're unsure about the specific requirements for your vehicle's floor pan, you can always contact our expert team for technical advice on surface preparation before you begin the install.
Cutting and Trimming: Tools for a Seamless Professional Fit
Selecting the right car carpet installation tools needed for your project determines whether your interior looks factory-fresh or like a DIY disaster. The process begins with alignment. Lay the carpet inside the cabin and align it with the transmission tunnel first. Do not reach for the knife immediately. Let the carpet sit for at least 60 minutes to settle into the floor pan's contours. Once you are satisfied with the positioning, make your first relief cut at the gear shifter or the highest point of the tunnel. This allows the material to drop naturally into the footwells without bunching.
For seat bolts and seatbelt anchors, professionals use the 'X' technique. Locate the bolt hole from underneath the vehicle using an awl and push it through the carpet. From the cabin side, use a sharp utility knife to cut a small 'X' over the awl point. This method prevents the carpet from snagging or tearing when you thread the bolts back in. When working around the centre console and wheel arches, trim in small increments. It is easier to remove an extra 5mm later than it is to fix an over-cut that exposes the bare metal floor.
Tru-Fit has manufactured automotive flooring for more than 40 years, and their pre-shaped designs change the installation dynamic. Because these carpets are moulded to the specific floor pan of your vehicle, you won't need heavy-duty stretching equipment. You can find more molded carpet installation tips to help manage the transition areas, but a well-manufactured mould does most of the heavy lifting for you. While having the right car carpet installation tools needed is vital, using them with precision around complex curves is what defines a professional finish.
Precision Cutting Equipment
- Step 1: Use a fresh blade for every major section. Fibres can dull a blade quickly, leading to jagged edges or snags in the pile.
- Step 2: Employ a soldering iron on synthetic carpets. Use the hot tip to cauterize the edges of bolt holes, which prevents the synthetic backing from unravelling over time.
- Step 3: Use a sharp 25mm chisel for seat tracks. A chisel allows you to make clean, rectangular cut-outs that are difficult to achieve with a standard knife.
Fitting and Shaping Tools
Keep a heat gun on a low setting to relax any stubborn shipping creases. Focus the heat on the backing, not the pile, to avoid melting the fibres. A rubber mallet is essential for seating the carpet firmly into deep footwells and tight corners without leaving marks. Finally, a stiff putty knife or a dedicated 'tucking tool' is used to push the carpet edges securely under side kick panels and door sill plates for a clean, hidden finish.
Adhesives and Sound Deadening Installation Equipment
The success of your interior restoration depends on what lies beneath the surface. While the carpet provides the aesthetic finish, the materials beneath it determine cabin comfort during long drives across Australia or through heavy city traffic. Professional results require more than just glue; they require a system of tools designed to manage heat and vibration. Selecting the right car carpet installation tools needed for this phase ensures your insulation stays put for the next decade without peeling or vibrating loose.
Sound Deadening Application
A steel or hard rubber roller is a non-negotiable tool for this stage. You cannot apply enough pressure with your hands to eliminate air pockets in butyl sheets. Use heavy-duty scissors to cut through thick foil-backed insulation, as standard office shears will dull instantly. Always wear heat-resistant gloves when working around the transmission tunnel. This area retains heat long after the engine stops, and the edges of foil insulation can be razor-sharp during handling.
Adhesive Application Tools
For the main floor area, a high-temperature contact adhesive is essential. In the Australian climate, interior temperatures can exceed 120°C in a locked vehicle, so standard craft glues will fail. Use a pneumatic spray gun for bulk areas to get even coverage, but keep disposable brushes for detail work around pillars and sills. Once the carpet is laid, use weighted sandbags to hold the material into deep footwell contours while the adhesive cures. This prevents the "tenting" effect where carpet pulls away from the floor corners.
Tru-Fit has spent more than 40 years refining the process of interior protection. We understand that the bond is only as good as the force applied during the initial set. Having the correct car carpet installation tools needed on hand prevents the adhesive from drying before the carpet is positioned correctly. Precision matters here. A well-bonded floor provides a factory-standard finish that lasts for the life of the vehicle.
Ready to upgrade your ride with professional-grade materials? Talk to the experts at Tru-Fit for advice on the best insulation and adhesive systems for your specific vehicle make and model.
The Tru-Fit Advantage: How Moulded Carpets Simplify Your Tool Kit
Choosing the right product is the most overlooked part of your project preparation. If you buy a flat roll of generic carpet, the list of car carpet installation tools needed will suddenly include expensive stretching racks and industrial heat guns. These are tools most DIYers don't have in their shed. By choosing a moulded product, you skip the professional upholstery shop requirements and stick to basic hand tools.
For more than 40 years, Tru-Fit has manufactured automotive flooring specifically for the Australian market. We've accumulated a huge range of patterns, moulds, and dies that match specific vehicle floor pans. This legacy means our carpets arrive with the humps and footwells already shaped into the fabric. You won't spend hours trying to force a flat piece of textile into a complex corner. You spend less time trimming and more time driving.
Our Australian-made products are built for local conditions. Standard carpets often fail under the intense heat and UV levels found in parts of Australia. Tru-Fit carpets use durable materials that maintain their shape and colour over the long term. This built-in durability means you don't need specialized chemical stabilisers or heavy-duty steamers to make the carpet behave during the install.
Why Precision Moulding Matters
Tru-Fit carpets are shaped to your specific floor pan. This precision reduces the need for "bunching" tools or complex tucking techniques. Our acoustic and textile engineers provide continual advice to ensure our carpet kits integrate perfectly with modern soundproofing layers. This engineering focus means the carpet sits flush against the floor without air gaps. If you run into a snag, you can call us. Having an expert at the end of the phone is often the most valuable tool in your kit.
Ready to Restore Your Interior?
Before you start your weekend project, do a final check of your gear. You'll need a sharp utility knife, heavy-duty scissors, a marking pen, and high-quality contact adhesive. You can buy premium adhesives and underlay directly from us to ensure compatibility with your new flooring. Using the right glue prevents the carpet from shifting or bubbling when the cabin gets hot.
- Moulded Tru-Fit carpet kit specific to your vehicle model.
- Sharp utility knife with at least 5 spare blades.
- Socket set and screwdrivers for seat and trim removal.
- High-temperature contact adhesive (spray or brush-on).
- Replacement underlay or sound deadening pads.
- Marking chalk or a silver paint pen for cut lines.
Stop struggling with generic materials that weren't designed for your car. Get a professional finish without the professional price tag. Shop Tru-Fit's Range of Moulded Carpets & Vinyls today and start your interior restoration with the right foundation.
Get Your Interior Project Underway Today
Don't settle for a sub-par fit when you can rely on decades of local industry experience. Whether you're restoring a classic Aussie icon or upgrading a modern daily driver, having the right expert advice makes all the difference to your final result. Make your Enquiry Now! Talk to the Tru-Fit experts about your car carpet needs.
Frequently Asked Questions
Can I install a car carpet with just a standard box cutter?
You can use a standard box cutter, but you must change the blade every 3 to 4 cuts to prevent snagging the carpet pile. A professional utility knife with a retractable blade offers better control and safety during the process. Using a dull blade often leads to jagged edges that won't sit flush under the scuff plates. This is why a sharp blade is the most critical of all car carpet installation tools needed for a clean finish.
Do I really need a trim removal tool, or will a flathead screwdriver work?
Use a dedicated nylon trim removal tool instead of a flathead screwdriver to avoid permanent gouges in your plastic interior panels. Flathead screwdrivers concentrate pressure on a small point, which causes 85% of plastic clips to snap during removal. A plastic pry kit costs between A$15 and A$30 at most Australian auto stores and protects your vehicle's resale value.
What is the best adhesive for automotive carpet in the Australian heat?
A high-temperature contact adhesive rated for at least 120 degrees Celsius is essential for the Australian climate. Standard spray glues often fail when cabin temperatures reach 70 degrees Celsius in the summer sun. Look for industrial-strength products specifically labeled for automotive headliners and carpets to ensure a permanent bond that won't peel or bubble over time.
How do I find the bolt holes for the seats once the new carpet is laid?
Locate seat bolt holes by feeling for the depressions from underneath the vehicle or using a sharp ice pick to pierce the carpet from above. For a cleaner finish, use a soldering iron to melt a small hole through the carpet and backing. This prevents the carpet fibres from fraying or wrapping around the bolt during seat reinstallation, which is a common mistake for DIYers.
Do I need a heat gun to install a moulded car carpet?
A heat gun is a vital part of the car carpet installation tools needed to remove shipping creases and achieve a factory finish. Apply heat to the backing side at a distance of 15 centimetres to soften the bitumen or plastic layer. This allows the carpet to conform perfectly to the transmission tunnel and floor pans without overstretching the material.
Is it necessary to remove the entire centre console for a carpet change?
Removing the entire centre console is necessary for 95% of modern vehicles to ensure the carpet sits flat and secure. Attempting to tuck carpet under the console usually results in unsightly lumps and poor fitment around the gear shifter. Most consoles are held by 4 to 6 bolts; removing them adds about 20 minutes to the total project time but ensures a professional result.
What tools do I need to install sound deadening under the carpet?
You need a weighted rubber or wooden roller to apply pressure and eliminate air bubbles under the deadening sheets. A heavy-duty utility knife and a bottle of wax and grease remover are also required to prep the metal surface. Proper adhesion requires 100% surface contact, which you can only achieve by using a dedicated application roller during the installation.
Can I use household scissors to trim the excess carpet?
Household scissors lack the leverage to cut through heavy automotive backing and will likely dull before you finish the first row. Use heavy-duty industrial shears or a fresh utility knife for all major trimming tasks. Standard scissors often crush the carpet pile rather than cutting it, leading to messy edges that are difficult to hide under the door seals.